TARGET:
– creating separate batches for convenient management
– extracting groups of created batches with selected parameters
COURSE (plugins used): MTS – IFC SPLIT – MODULE:MULTIFILE – ADVANCED REPORTS
2. We will use the MTS plugin (learn more, buy or download the plugin in demo version)
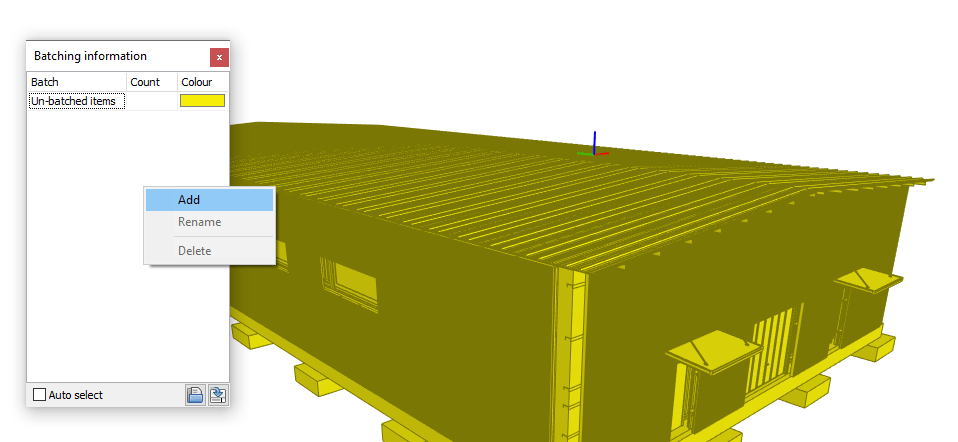
3. Click on the “Batching” icon in the button group of the MTS plugin 
5. Right-click on an empty field in the “Batching information” window, then “Add.” After entering the name, simply confirm. 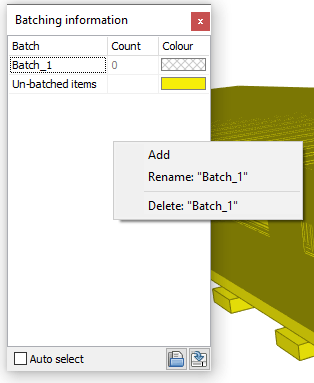
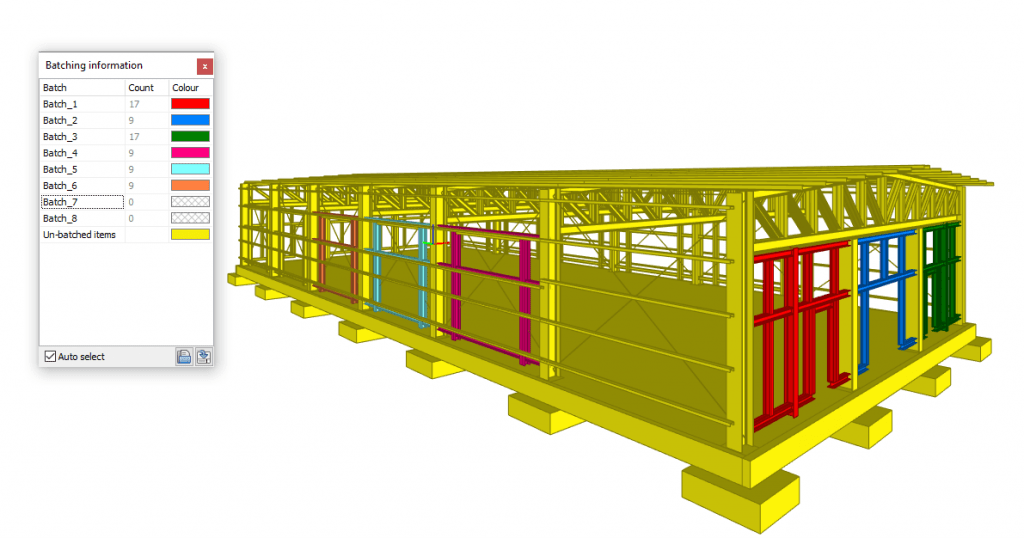
6. In the same way, you can create batches and give them individual colors
7. Select items in the model. (You can do this by holding down the Ctrl button and clicking on individual profiles)
8. After selecting the items (they will turn green), right-click and hover the cursor over “Set batch”. You will be able to select one of the created batches from the drop-down list (“Batching information” dialog box).
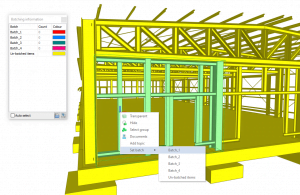

10. If you want to change the assignment of an element to a batch, you just need to select it and set the batch again. The item will be “moved” to another batch.
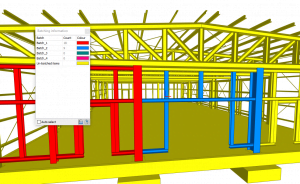

12. Once you have prepared your batches and set them up according to the adopted methodology, you will be able to easily and quickly extract them into separate IFC files. The IFC Split plugin will help you with this (learn more, buy or download the plugin demo version)
12. * Before continuing, you can also save your batches to a .csv file here. You will then be able to load them into the model. 
13. At this point, make sure you have the “Auto select” option active. If it is not, please activate it. ![]()
14. With this setting – when you click on one of the batches on the list, you will select model elements belonging to that batch (the selection is highlighted in green).
15. Now you can use the IFC Split plugin right away. But before you do it, go to the “Tools” drop-down list in the IFC Split plugin’s section and check the “Update project name” option. With this option, at the time of export – when entering a name for a file, you will simultaneously change the value of the “Project name” property for all elements belonging to the created batch.


16. If you still have the group selected, click the Export option and choose “Export selected” from the drop-down list.


17. You can give the name of the selected batch to the newly created file. Remember that by selecting the “Update project name” function, the entered name will already appear as a property inside the IFC model. It will be possible to use this information in further work.
18. Run BIMvision and open one of the exported files.
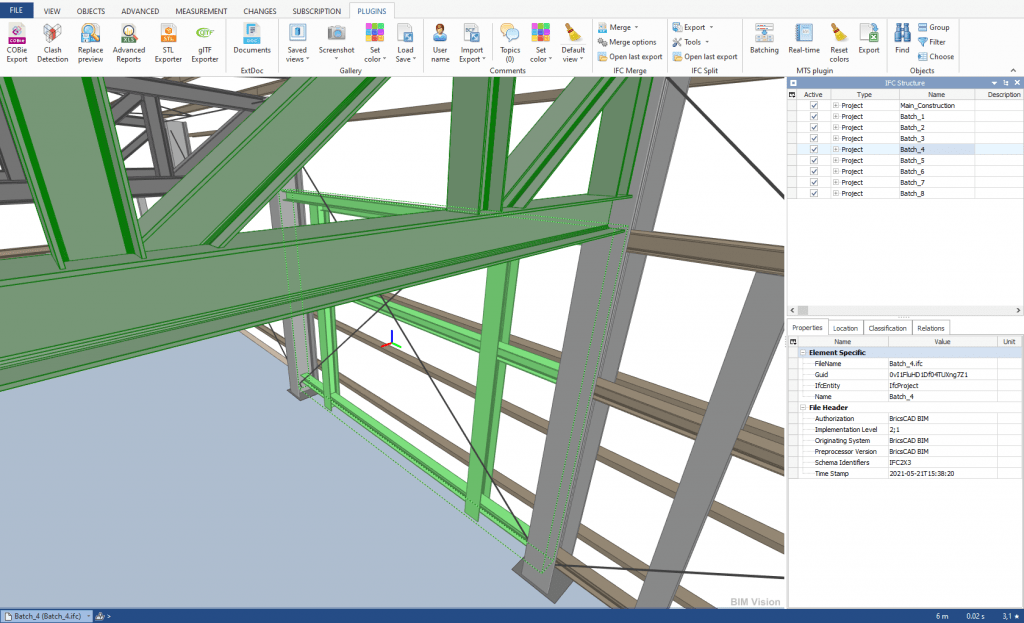
19. You will now need the Multifile module. Go to “File” and select “Add files”. When the window with the view of your files opens, you can select them all and open them in BIMvision at the same time.

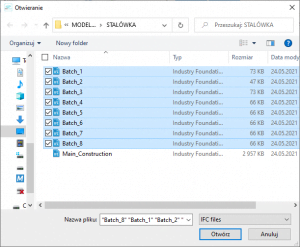
21. Now pay attention to “Batch_4” by double clicking on the “Batch_4” item in the IFC structure tree
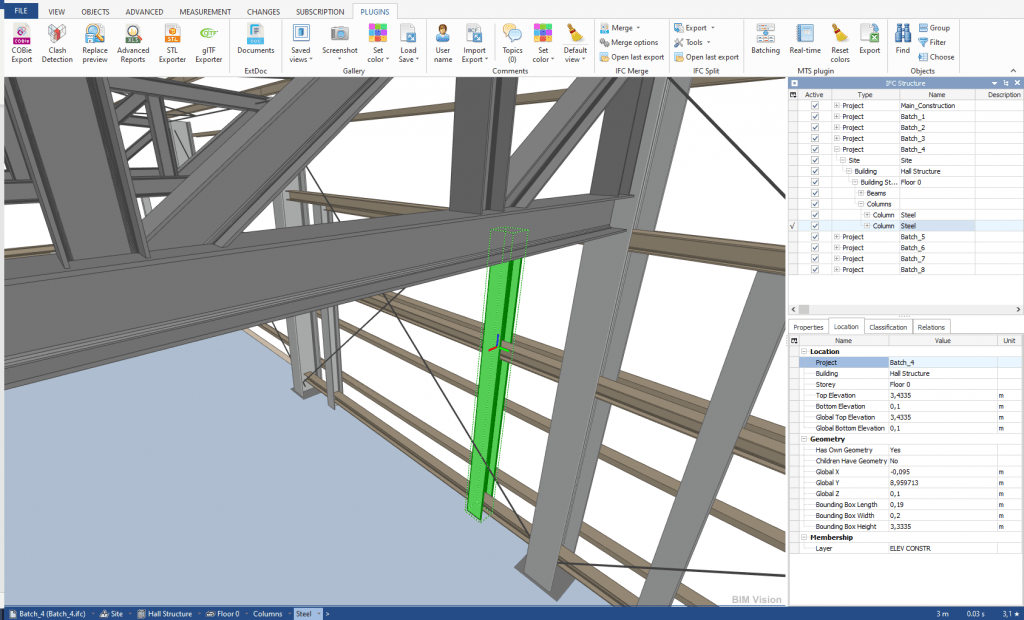
22. Click on one of the elements of the selected batch in the model. When you highlight it, look at its properties and then go to the tab next to it – “Location”.

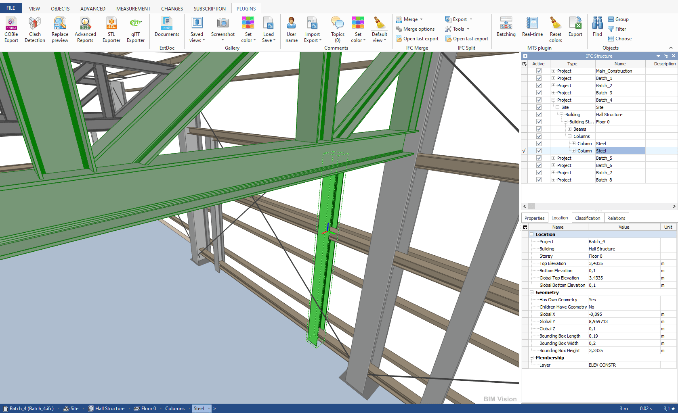
23. It is here, in the “Location” tab, that you will find the information that you included in the project using the IFC Split plugin and the “Update project name” option. Due to the fact that the name entered was the name of the batch, we can see that the elements are further “batched” according to this information, i.e. the “Project name”. We will use this fact in our further activities.
24. In the Advanced Reports plugin, the “Project name” information can be used in two different ways.
(* First method: 25.1.A-G; * Second method: 25.2.A-E)
First method
25.1 The first one is to use it as a feature that will allow us to define the group of objects we are interested in that we want to include in the statement.

25.1.A Open the Advanced Reports plugin. Choose “Custom selector” as a selection method.
25.1.B To use the property that interests us at the moment, click the first cell and define that we will use the “property”.

25.1.C Blank cells will appear to be completed in order to define your conditions. Enter which property set the selected property belongs to (Property set). Then enter the property name (Property), and the value of the indicated property (Property value). Note that you can easily maneuver the conditions. For example, you can specify that the value of a property must be greater than a certain number, that the name must contain some combination of letters, or that the value must be exactly the same as entered in the guidelines.
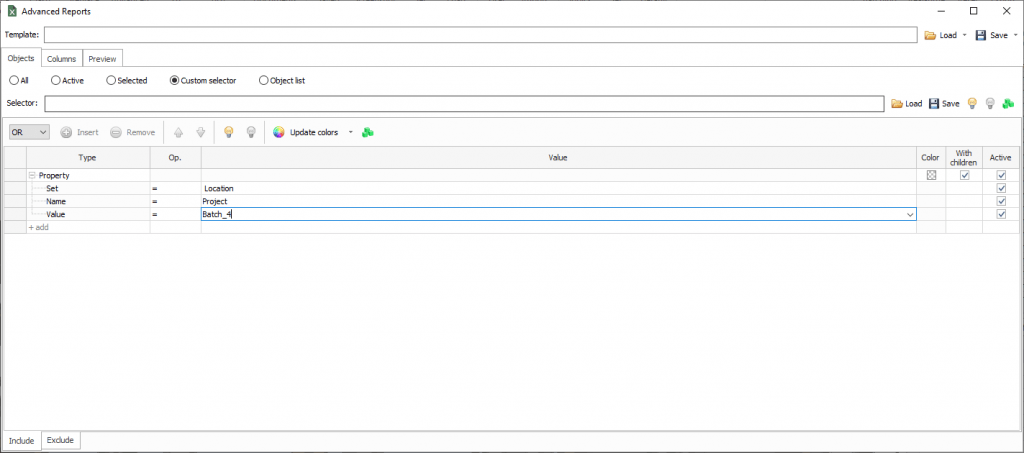
25.1.D When you click on the bulb, you will see what elements in the model are included in the selector (therefore you can enter even complex conditions and then verify them with the model view)

25.1.E In the lower “Exclude” tab, enter a condition so that the list does not include project elements with the indicated “Property name”, that are not geometric elements (such as IfcBuilding, IfcBuildingStorey or IfcSite)

25.1.F When you go to the next tab of the Advanced Reports plugin, you will be able to define what parameters you want to include in the resulting list. (Creating a list of elements from a selected batch with their selected properties).

25.1.G The result of our operations is in the last tab. The obtained data can be easily exported to an Excel file (Save file) or saved the settings as a template (which can be reloaded into the plugin).

Second method
25.2 The second case is adding this information (about belonging to a batch) in the statement table. Additionally, by adding such information to the table of properties, we can also use it to group elements included in the list, or to differentiate groups of elements by color.
25.2.A For example, in the first tab of the Advanced Reports plugin, we can define that we are interested in all elements of the project. Then we define what features we want to achieve in the final list. Based on these properties, we can distinguish, sort or group them.
25.2.B On the screen in the first tab, we define that we are interested in “all” elements.
* due to the fact that we take into account all project elements, the table will also include those without geometry. If we want to avoid such a situation, we can use, for example, another option of defining objects for statements.

25.2.C In the next tab, we select the features that we want to obtain in the final statement. Additionally, we set the grouping on the right side according to the “Project” property
* Using the Move up / down options, we can move the lines with the names of the selected properties. The order that will be set here will be reflected in the layout of the result table columns (in the third tab).
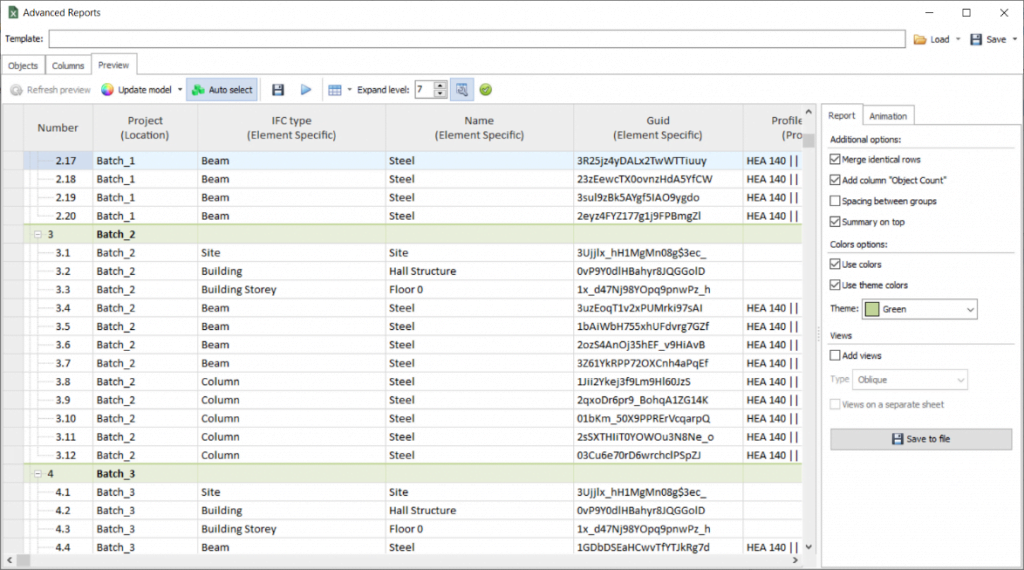
25.2.D In the result table we can see the individual properties of all elements. Let’s pay attention to their grouping according to the individual batches they belong to.
25.2.E The result is in the last tab („Preview”). The obtained data can be easily exported to an Excel file using “Save to file”. You can also save the settings as a template by entering into the drop-down list under the disk icon “Save”. If you save the template “to file”, you will be able to store it on your computer and reload it using “Upload”. An alternative option is to save it to the „library” of the Advanced Reports plugin in BIMvision.


